Why are beeswax candles so expensive?
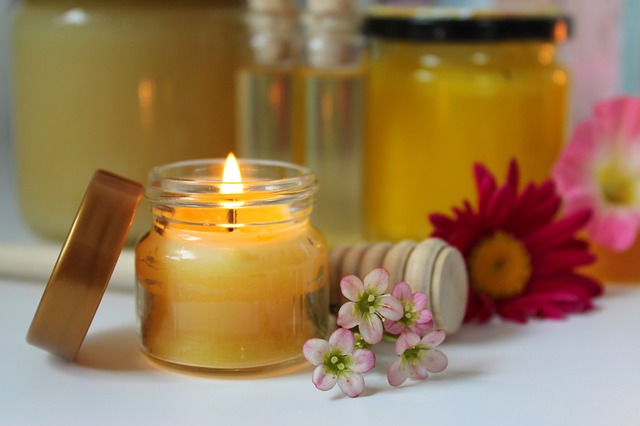
Beeswax candles are a popular choice for many people due to their natural and environmentally friendly properties. However, they are often more expensive than traditional candles made from paraffin wax. So, why are beeswax candles so expensive?
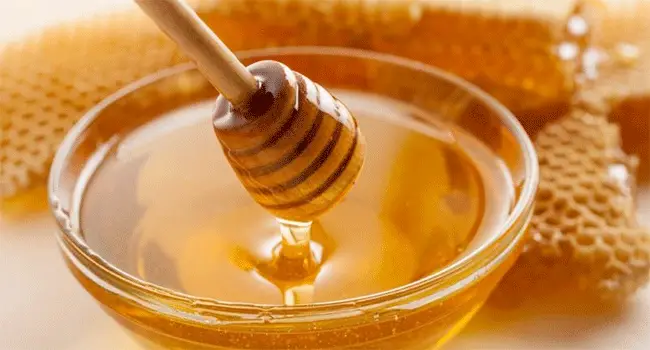
One reason for the higher price of beeswax candles is the cost of production. Beeswax is a natural byproduct of honey production, but it takes a lot of bees and a lot of time to produce a sufficient amount of beeswax. A single hive of bees can produce about two pounds of beeswax per year, which is not a lot considering the demand for beeswax candles.
In addition to the time and resources required to produce beeswax, it is also a more expensive material to work with. Beeswax has a higher melting point than other waxes, so it requires more energy to melt and mold into candle shapes. It also has a more sticky and difficult-to-work-with consistency, which can make it more time-consuming and labor-intensive to work with.
Another factor contributing to the cost of beeswax candles is the fact that they are often handmade by small-scale producers or artisan candle makers. These producers may not have the same economies of scale as larger companies, resulting in higher production costs and higher prices for the final product.
In addition to the cost of production, beeswax candles also have several benefits that justify their higher price. For one, beeswax candles are much longer lasting than traditional candles, with some beeswax candles lasting up to three times as long as their paraffin counterparts. They also burn cleaner, releasing fewer toxins and pollutants into the air. This makes them a more environmentally friendly choice, which can also contribute to their higher price.
Beeswax candles are also highly sought after for their natural, honey-like scent and their ability to purify the air. Many people believe that beeswax candles can help to reduce allergies and asthma symptoms, making them a worthwhile investment for those with respiratory issues.
In conclusion, beeswax candles are more expensive due to the cost of production, the labor-intensive nature of working with beeswax, and the fact that they are often handmade by small-scale producers. However, their longer burning time, clean burn, and natural benefits make them a worthwhile investment for many people. While they may be more expensive upfront, they can ultimately save money in the long run due to their longevity and health benefits.
Frequently Asked Questions:
How to make beeswax candles?
-
Gather your materials: beeswax, wicks, double boiler or microwave-safe bowl, scissors, and candle molds or containers.
-
Melt the beeswax: Place the beeswax in a double boiler or microwave-safe bowl and heat until it is fully melted. If using a double boiler, make sure the water is not touching the bowl. If using the microwave, heat the beeswax in short bursts, stirring in between, until it is fully melted.
-
Prepare the wicks: Cut the wicks to the desired length and tie one end to a pencil or skewer. Place the wick in the center of the candle mold or container.
-
Pour the beeswax: Carefully pour the melted beeswax into the candle mold or container, making sure to not disturb the wick. If using a candle mold, tap the mold gently to remove any air bubbles.
-
Allow the candle to cool and harden: Place the candle in a cool, dry place and allow it to completely cool and harden. This can take several hours to overnight, depending on the size of the candle.
-
Trim the wick: Once the candle has cooled and hardened, trim the wick to about 1/4 inch long. Your beeswax candle is now ready to use!
Why add coconut oil to beeswax candles?
There are a few reasons why coconut oil is often added to beeswax candles:
-
Coconut oil is a natural, renewable resource that is easily accessible.
-
Coconut oil helps to improve the burn time of the candle by making the wax more fluid and allowing it to burn more evenly.
-
Coconut oil helps to reduce the amount of smoke produced when the candle is burning.
-
Coconut oil has a natural, tropical scent that can add a pleasant aroma to the candle.
-
Coconut oil can help to reduce the amount of wax that is wasted when the candle is burning, as it helps the wax to burn more efficiently.
Overall, adding coconut oil to beeswax candles can help to improve their performance and make them more enjoyable to use.
How to make candles from fresh beeswax?
-
Melt the beeswax: Place the beeswax in a double boiler or a heat-safe container set over a pan of simmering water. Stir occasionally until the beeswax is completely melted.
-
Add fragrance: If you want to add fragrance to your candle, now is the time to do so. Pour in a few drops of essential oil or candle fragrance oil and stir to combine.
-
Pour the wax into a mold: Use a funnel to pour the melted beeswax into a candle mold. If you don’t have a mold, you can also use a small jar or tin.
-
Insert the wick: Cut a piece of the wick to fit the size of your mold or jar. Tie one end of the wick to a chopstick or pencil and rest it across the top of the mold or jar. The wick should be centered and the pencil or chopstick should be propped up on something so that the wick stays in place.
-
Let the candle set: Allow the candle to cool and harden completely, which can take several hours or even overnight. Once the candle is completely set, carefully remove it from the mold or jar.
-
Trim the wick: Use scissors to trim the wick to about ¼ inch. Your beeswax candle is now ready to use!
How to make beeswax candles from raw beeswax?
To make beeswax candles from raw beeswax, you will need:
- Raw beeswax
- Wicks
- A double boiler
- A pouring pot or candle mold
Instructions:
- Melt the beeswax in the double boiler over low heat until it is completely melted.
- Place the wick in the center of the pouring pot or candle mold.
- Pour the melted beeswax into the pouring pot or candle mold, making sure to fill it to the desired height.
- Allow the beeswax to cool and harden completely, which may take several hours or overnight.
- Trim the wick to the desired length and enjoy your homemade beeswax candle!
How to melt beeswax for candles?
- First, gather the beeswax and any desired additives such as essential oils or colorants.
- Place the beeswax in a double boiler or in a heat-safe container that can be placed in a pot of simmering water.
- Bring the water to a simmer and allow the beeswax to melt slowly, stirring occasionally.
- If using additives, mix them in once the beeswax is fully melted.
- Pour the melted beeswax into the candle molds or containers and allow it to cool and solidify before use.
How to make candles with beeswax?
-
Gather your materials: beeswax, wick, wick tabs, double boiler or microwave-safe container, candle mold or jar, scissors, and a thermometer (optional).
-
Melt the beeswax using a double boiler or microwave. If using a double boiler, fill the bottom pot with water and place the beeswax in the top pot. Heat over medium heat until the beeswax is fully melted. If using a microwave, place the beeswax in a microwave-safe container and heat in 30-second intervals until fully melted.
-
While the beeswax is melting, prepare the wick. Cut the wick to the desired length and attach a wick tab to the bottom. If using a candle mold, place the wick in the center and secure it with the wick tab. If using a jar, attach the wick tab to the bottom of the jar and position the wick in the center.
-
Once the beeswax is fully melted, remove it from the heat and add any desired essential oils or fragrance oils. Stir well to ensure they are fully incorporated.
-
Carefully pour the melted beeswax into the candle mold or jar, making sure to not disturb the wick. If using a thermometer, the beeswax should be around 150-160 degrees Fahrenheit to ensure a smooth and even pour.
-
Allow the candle to cool completely before removing it from the mold or trimming the wick.
-
Enjoy your homemade beeswax candle!
How to make beeswax candles with essential oils?
-
Gather your materials: beeswax, essential oils, wick, wick tab, candle mold or jar, and a double boiler or microwave-safe container.
-
Melt the beeswax in the double boiler or microwave-safe container until it is fully liquid.
-
Add a few drops of your chosen essential oil to the melted beeswax, stirring to combine. You can use any essential oil you like, but some popular choices for candles include lavender, peppermint, and citrus scents.
-
Cut the wick to the desired length and attach the wick tab to the bottom.
-
Place the wick in the center of the candle mold or jar and pour the melted beeswax mixture around it. Make sure the wick stays centered and upright as the beeswax cools and hardens.
-
Allow the candle to cool and harden completely, which may take several hours.
-
Trim the wick to about 1/4 inch before lighting the candle. Enjoy the natural fragrance and ambiance of your homemade beeswax candle with essential oils.
How to make a candle?
To make a candle, you will need:
- A wax melting pot or double boiler
- Candle wax (either paraffin or soy wax)
- Wicks with a metal base or tab
- Fragrance oil or essential oils (optional)
- Dye (optional)
- Glass jars or containers for the candles
Instructions:
- Melt the wax in the melting pot or double boiler. If using fragrance or essential oils, add them to the melted wax. If using dye, mix it in as well.
- Place the wick in the center of the jar or container. You can hold it in place with a wick holder or simply let it rest on the bottom of the jar.
- Pour the melted wax into the jar or container, being careful not to disturb the wick.
- Allow the wax to cool and harden completely before trimming the wick to about 1/4 inch.
- Light the candle and enjoy!
How to get candle wax out of the carpet?
There are a few different methods you can try to remove candle wax from your carpet:
-
Use a plastic knife or spoon to carefully scrape off as much wax as possible.
-
Place a brown paper bag or piece of newspaper over the wax and iron on low heat. The wax will melt and absorb into the paper.
-
Use a mixture of equal parts vinegar and water to gently blot the wax stain. Rinse with cold water and blot dry.
-
Mix a few drops of dish soap with warm water and gently blot the wax stain. Rinse with cold water and blot dry.
-
If the above methods don’t work, you can try using a commercial carpet stain remover according to the manufacturer’s instructions. Be sure to test a small, inconspicuous area first to make sure it doesn’t damage the carpet.
How to wrap a candle?
To wrap a candle, you will need the following materials:
- Wrapping paper
- Scissors
- Glue or tape
- Ribbon or twine
Instructions:
- Measure the size of the candle by wrapping a piece of wrapping paper around it. Cut the wrapping paper to the appropriate size, leaving enough excess paper to wrap around the candle completely.
- Place the candle in the center of the wrapping paper.
- Bring the two ends of the wrapping paper up and around the candle, securing them together with glue or tape.
- If using ribbon or twine, tie it around the wrapped candle to add an extra touch of decoration.
- You can also add additional decorations such as stickers or tags to the wrapped candle.
- Once finished, the candle is ready to be given as a gift or displayed in your home.
How to get candle wax out of clothes?
- Place a piece of brown paper bag or newspaper on top of the wax stain.
- Use a hot iron to slowly melt the wax, moving the iron back and forth over the paper.
- As the wax melts, it will be absorbed into the paper.
- When the wax is fully melted and absorbed, carefully remove the paper.
- If any wax remains, repeat steps 2-4 until the stain is completely removed.
- If any residue remains, apply a small amount of laundry detergent to the stain and rub gently to remove it.
- Wash the garment as normal in the washing machine.
How to get wax out of a candle jar?
To remove wax from a candle jar, follow these steps:
-
Place the candle jar in the freezer for a few hours. This will cause the wax to harden and become easier to remove.
-
Once the wax has hardened, use a butter knife or spoon to gently lift and scrape the wax out of the jar. You may need to use some force, but be careful not to break the jar or scratch it with the knife.
-
If there are still bits of wax stuck to the jar, use a paper towel or rag to gently wipe them away. You can also use a hair dryer to melt any remaining wax and make it easier to remove.
-
Wash the jar with hot, soapy water and a sponge or scrub brush to remove any remaining wax or debris.
-
Rinse the jar thoroughly and let it dry before reusing it. If the jar is still dirty or sticky, you can use rubbing alcohol or a candle wax remover to clean it further.
How to fix candle tunneling?
To fix candle tunneling, follow these steps:
-
First, let the candle burn until the wax pool reaches the edges of the jar. This will help to create an even burn across the surface of the wax.
-
Trim the wick to about 1/4 inch before lighting the candle. This will help to prevent the flame from burning too hot, which can cause tunneling.
-
Avoid burning the candle for more than 4 hours at a time. This will help to prevent the wax from burning down too far and causing tunneling.
-
If the candle has already started tunneling, let it burn until the wax pool reaches the edges of the jar again. Then, blow out the flame and use a butter knife or spoon to gently push the wax back towards the center of the jar. This will help to create an even burn and prevent further tunneling.
-
If the candle is still tunneling after following these steps, consider using a candle topper or snuffer to extinguish the flame. This will help to prevent hot wax from dripping down the sides of the jar and causing further tunneling.
How to light a candle without a lighter?
There are several ways to light a candle without using a lighter:
-
Use a match: Find a match or a box of matches and strike the match against the rough surface to ignite the tip. Hold the match close to the wick of the candle and allow the flame to transfer to the wick.
-
Use a magnifying glass: If you have a magnifying glass, you can use the sun’s rays to focus and heat the wick enough to ignite it.
-
Use a flashlight: Aim the flashlight at the wick and hold it close enough to the candle to heat the wick.
-
Use a steel wool pad: Rub the steel wool pad against a battery to create sparks. Hold the steel wool close to the wick and the sparks should ignite the wick.
-
Use a paperclip: Bend the paperclip into a small “V” shape and hold it against the wick. Rub the paperclip back and forth quickly until the wick lights.
How to start a candle business?
-
Research and identify your target market: Determine who your potential customers are and what types of candles they are interested in purchasing. Consider factors such as age, gender, income level, and location.
-
Choose a niche: Decide on a specific type of candle to focus on, such as soy candles, scented candles, or handmade candles. This will help you stand out in a crowded market and appeal to a specific type of customer.
-
Determine your pricing: Research the cost of materials and labor to determine how much you need to charge for your candles. Consider your target market and competition when setting your prices.
-
Create a business plan: Develop a clear plan for your business, including your marketing strategy, financial projections, and target audience.
-
Choose a name and brand: Come up with a memorable and catchy name for your business and create a cohesive brand identity. This includes choosing a logo, color scheme, and overall aesthetic.
-
Create a website: Build a website to showcase your products, provide information about your business, and allow customers to purchase your candles online.
-
Purchase materials and equipment: Purchase all necessary materials and equipment, including wax, wicks, containers, labels, and packaging.
-
Create and test your products: Experiment with different scents, colors, and shapes to create unique and high-quality candles. Test your products to ensure they are of the highest quality before selling them.
-
Promote your business: Use social media, email marketing, and other forms of promotion to spread the word about your business and attract customers. Consider participating in local events and craft fairs to showcase your products and build a customer base.
How to make a candle wick?
To make a candle wick, you will need:
- Cotton string or thread
- Beeswax or candle wax
- Scissors
- A paper clip or pencil
Instructions:
-
Cut a piece of cotton string or thread to the desired length for your candle. The length of the wick should be about 1/4-1/2 inch shorter than the height of the candle.
-
Bend the paper clip or pencil into a U shape, with the ends slightly curved inwards. This will serve as a holder for the wick while it drips with wax.
-
Place the wick onto the paper clip or pencil, with the curved ends of the wire holding it in place.
-
Melt the beeswax or candle wax in a double boiler or microwave-safe container.
-
Dip the wick into the melted wax, making sure to coat it evenly and completely.
-
Allow the wax to cool and harden on the wick. This may take a few minutes to an hour, depending on the size of the wick and the amount of wax used.
-
Once the wax has hardened, the wick is ready to be used in a candle. Simply place it in the center of the candle mold or container, and pour the melted wax around it. Be sure to leave enough wick exposed at the top to allow for lighting.
-
Once the candle has cooled and hardened, you can trim the wick to the desired length. A longer wick will burn for a longer time, but may also create a larger flame. A shorter wick will burn more slowly, but may also create a smaller flame. Experiment to find the perfect wick length for your candle.
How to melt candle wax?
There are several ways to melt candle wax:
-
Using a double boiler: Place a small amount of wax in a glass jar or bowl and place it in a pot of boiling water. The steam from the water will melt the wax. Be careful not to get any water in the wax.
-
Using a microwave: Place a small amount of wax in a microwave-safe container and microwave on high for 30 seconds at a time, stirring in between, until the wax is fully melted.
-
Using a candle warmer: Place a candle in a candle warmer and turn on the heat setting. The candle wax will gradually melt as the warmer heats up.
-
Using a stove: Place a small amount of wax in a pot or saucepan and heat over medium heat until the wax is fully melted. Be careful not to overheat the wax as it can become flammable.
Where does candle wax go?
Candle wax typically goes into the candle itself, where it is burned and turned into heat and light energy. Some of the wax may drip down the side of the candle and solidify, but the majority of the wax is consumed by the flame during the burning process.
How to remove candle wax?
There are a few different methods you can use to remove candle wax:
-
Use a hair dryer: Heat the wax with a hair dryer until it becomes soft and pliable. Then, gently scrape it off with a butter knife or other flat utensil.
-
Use a paper towel: Place a paper towel over the wax and press down gently. Then, gently rub the wax with the paper towel to absorb it.
-
Use a heat gun: If you have a heat gun, you can use it to melt the wax and then wipe it away with a paper towel or cloth.
-
Use an iron: Place a paper towel or cloth over the wax and press it with a hot iron. The heat from the iron will melt the wax and it will be absorbed by the towel.
-
Use a wax remover: There are several commercial wax removers available that are designed to remove wax from surfaces. Simply apply the remover according to the instructions on the bottle and wipe away the wax.
How to clean candle jars?
To clean candle jars, follow these steps:
-
Remove any remaining wax from the jar by warming it up with a hairdryer or by placing it in the sun for a few minutes.
-
Once the wax is melted, use a spoon or butter knife to scrape out any remaining bits.
-
Rinse the jar with warm water and mild soap, such as dish soap. Use a sponge or a scrub brush to scrub the inside of the jar to remove any remaining wax residue.
-
Rinse the jar thoroughly with warm water to remove any soap residue.
-
If there are any stubborn spots or stains, mix a solution of equal parts white vinegar and water and use it to scrub the inside of the jar. Rinse thoroughly with warm water.
-
Dry the jar completely with a clean cloth or paper towel.
-
If the jar has any labels or stickers on it, use mild soap or rubbing alcohol to remove them.
-
If the jar has a lot of discoloration or staining, you can try using a mixture of baking soda and water to scrub it. Rinse thoroughly and dry before using again.

